Close, square, moved rather than reached over — the dosing instrument
Before You Touch Anyone put the two chairs in the room; see also → Before You Touch Anyone, "Before You Touch Anyone". Here they become the instrument by which the dose is measured out.
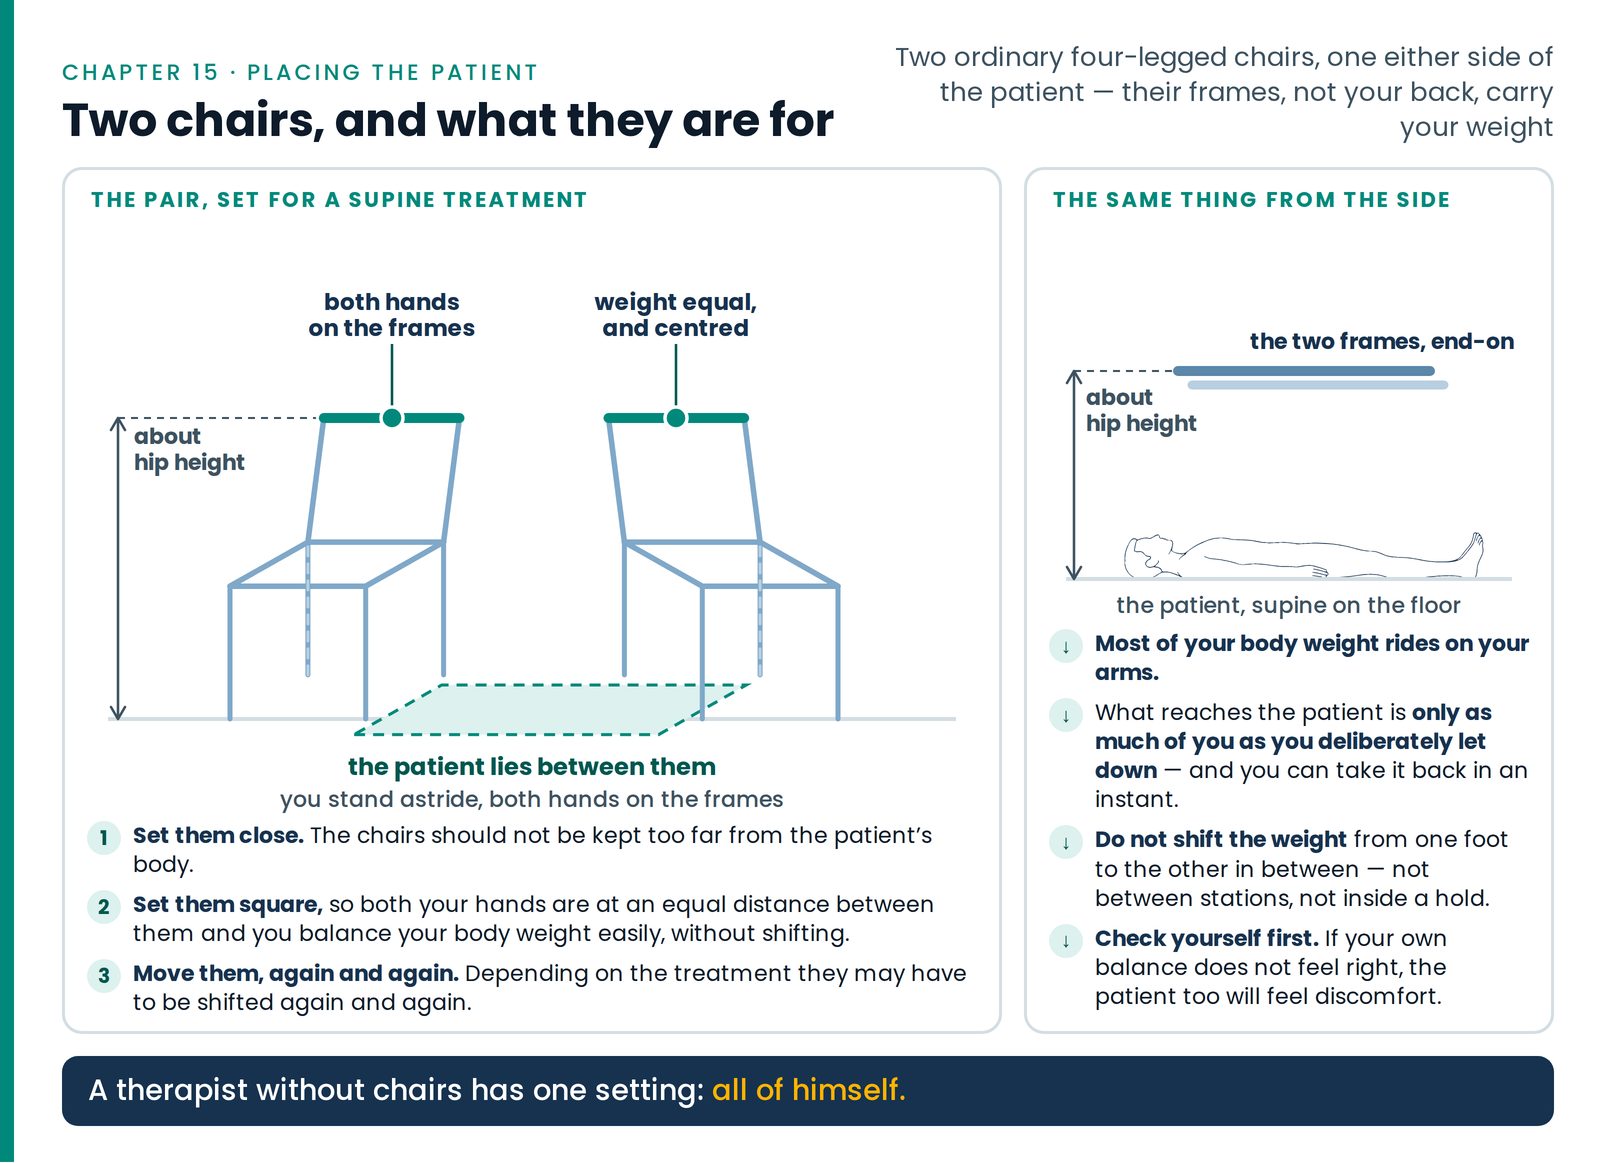
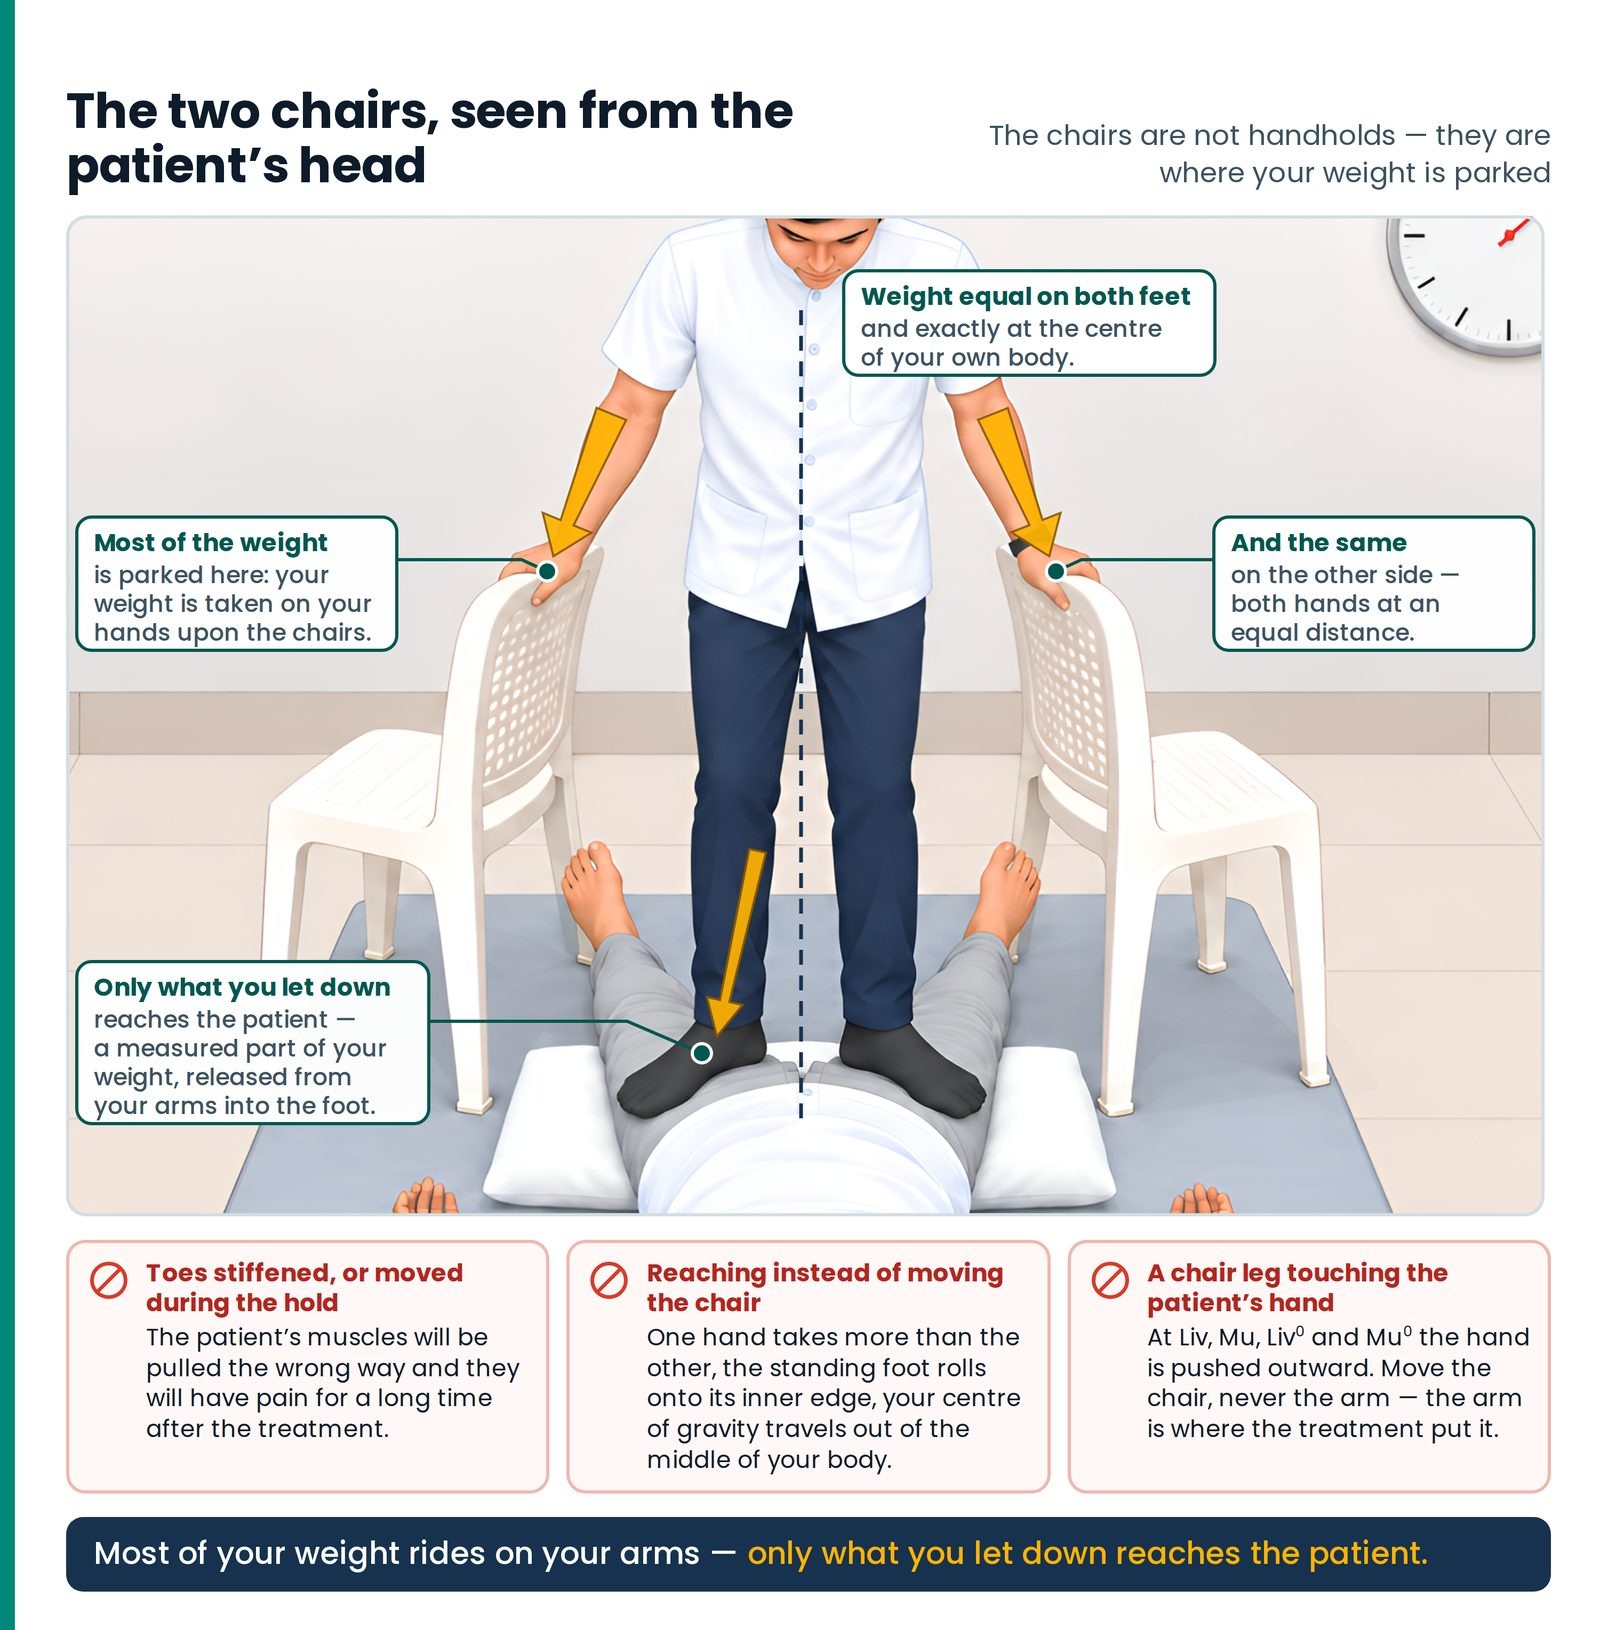
Two ordinary four-legged chairs are stood facing each other and turned over, so their seat and back frames make parallel rails at about hip height. The patient lies between them; you stand astride, both hands on the frames, and most of your body weight rides on your arms. What reaches the patient is only as much of you as you deliberately let down, and you can take it back in an instant. A therapist without chairs has one setting: all of himself. (Figure 15.2)
Two chairs, and what they are for. The two chairs of the page drawing redrawn: a pair set either side of the patient, their frames at about hip height, with the patient's lane between them and the same arrangement seen from the side.
The rule for the paired-limb treatments and the rule for the single-thigh treatments differ, and each is complete where it stands.
Key teaching
Where the weight goes — two stances, each with its own treatments
For Liv and its family — both feet on the patient. Keep the weight equal on both feet, and as far as possible try to keep your own knees straight, so that you will not tire. Both sides
For Gal and Spl — one foot on the patient. Do not bend your knee. Give the pressure with the middle part of your sole, lift the other foot clear of the ground and stand straight, so that your full weight comes onto the patient.
The two chairs, seen from the patient's head. The approved two-chair treatment illustration, labelled: the wide arrows show the weight parked on the arms in the chair frames, the narrow one what is let down into the treating foot, and three struck-through cards give the three ways it goes wrong.
In the first, two feet share; in the second, one carries and the other is deliberately lifted clear so nothing is left behind on the ground. In both the knee is straight. Left Right
Key teaching
Propped straight, not held straight
If the patient's legs stay straight, better results come.
But if the patient straightens their own legs, the muscles stay tight and they will be uncomfortable — so place a pillow on the outer side of the legs for support, to stop them rolling outward.
A muscle the patient is actively holding is short, stiff and cannot lengthen under your pressure; propped in the same shape it is quiet, long and receptive. The shape is identical; the tissue is not.
Read next
Before You Touch Anyone Before You Touch Anyone — the article that put the two chairs in the room
The Front of the Body I The Front of the Body — I — the treatments where one foot works a thigh and the other an arm
Loading one foot at a time
One foot without pressure, then the second, and only then your weight
This is the rule most often abandoned once a student is confident, and the one that prevents accidents.
When it is ignored, nothing dramatic happens — which is the difficulty. Both feet arrive together, the abdomen tightens, and you read that as the thigh "being hard today". The treatment goes into a braced body week after week, and improvement is slower than it should be for reasons nobody can name.
The soft middle of the sole
Broad, flat and thickly padded: the toes prick, the heel leaves pain
The sole is the palm's larger cousin — the thickest skin on the body, padded with fat divided into small sealed chambers by tough partitions, so a load spreads sideways instead of driving through. But only part of it is the tool.
Key teaching
Always from the middle part of the sole
Always give pressure from the middle part of the sole only.
If you press with the toes — the patient will feel a pricking sensation on the thigh, and you yourself may get pain in your calves.
If you press with the heel — the patient will feel pain at that place for a long time after the treatment.
Whichever part is named, rule 3 above still governs how it is laid. ▲ Take care
The toes are a row of small bones with almost no padding under their ends, so your load arrives through narrow ridges rather than one broad pad — hence the pricking; and to press with them you must rise onto the forefoot, holding your body on tiptoe six seconds at a time, fifty times a morning — hence your calves. The heel is a blunt bone with a pad built for brief, high, repeated loads in walking — the wrong shape for delivering somebody else's weight into a soft thigh for six continuous seconds, because it arrives over a small, hard, curved area and stays. Injury from outside pressure depends on how much, over how small an area, for how long, and the heel is bad on all three. The middle is broad, flat, thickly padded and genuinely soft: that is the tool. A thigh that feels dense does not need a smaller contact; it is a finding.
None of which forbids the heel where a treatment names it — and several do: the lumbosacral work is given with both sole and heel touching the back, the sacral points with the heels, and Pit with both heels very close to one another, pressed downward and inward. Where the heel is the named contact, rule 3 governs: lay it so the weight falls over a broad surface, not on a single point. It is forbidden as a substitute for the mid-sole, not where it is prescribed.
Ready to begin?
Send COURSE for course details, or your name, age and health issue for a consultation.